4. Single Sign-on with OpenID Connect
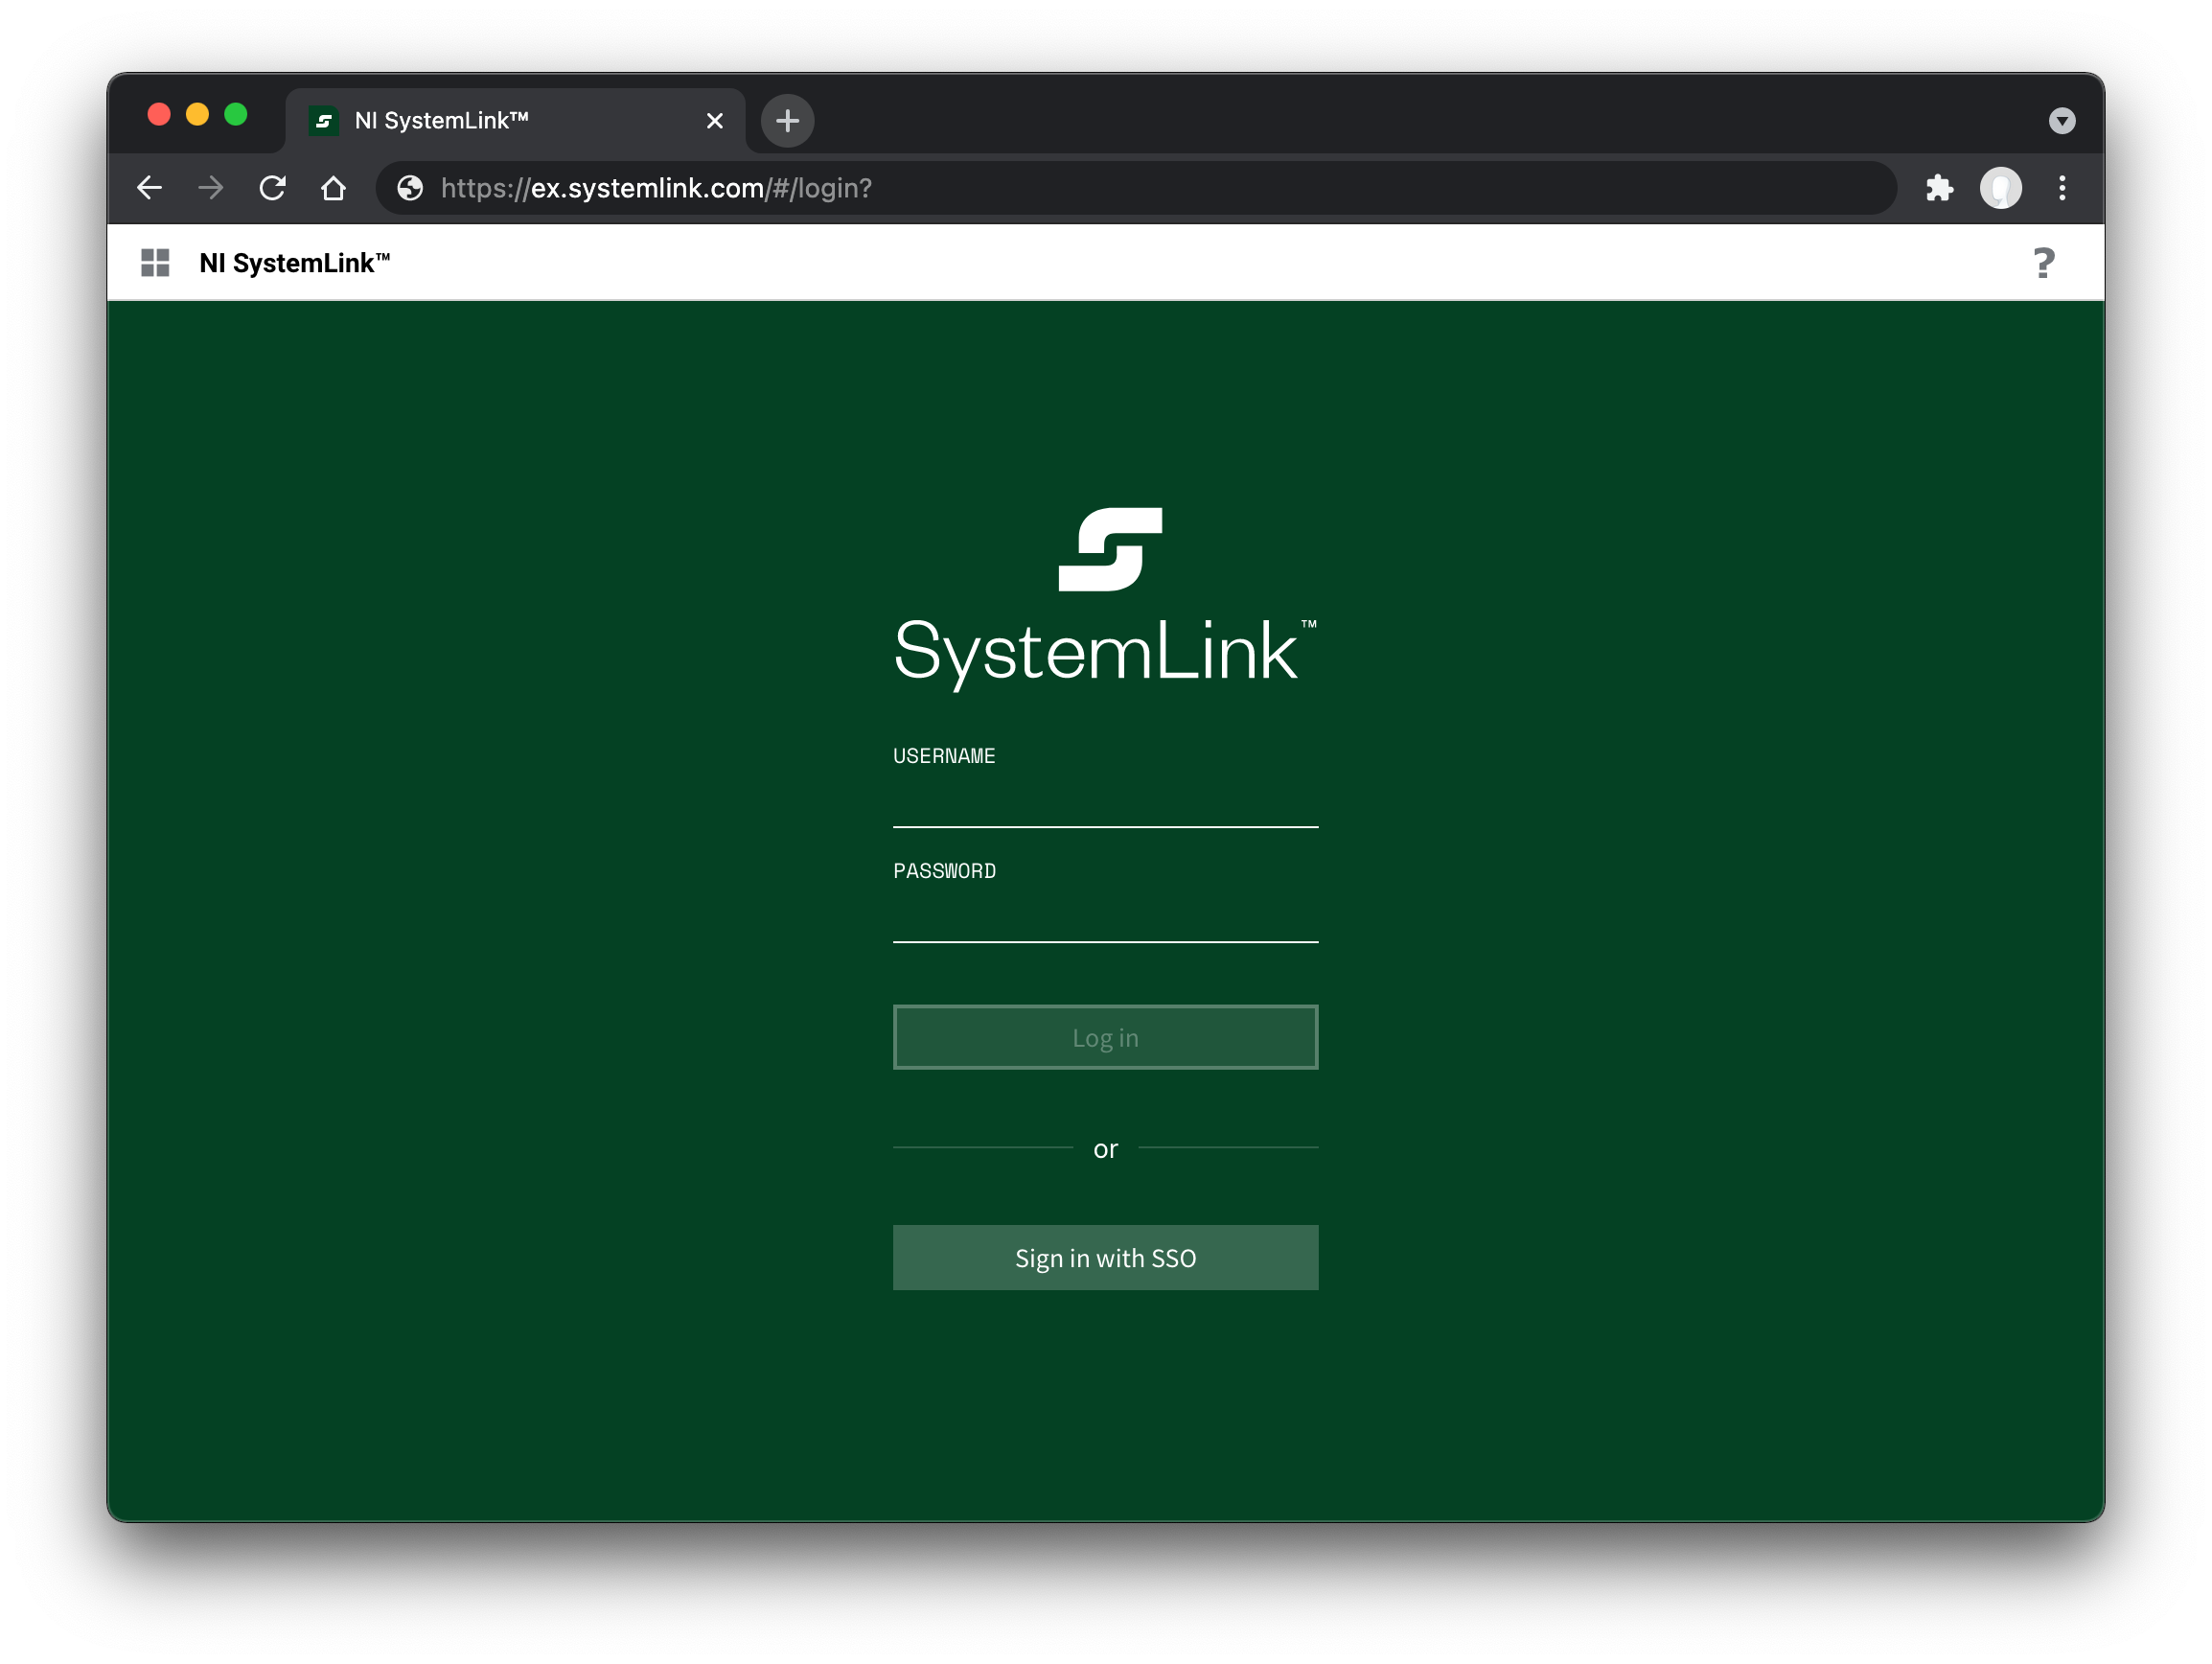
You can configure SystemLink to use OpenID Connect to authorize users. This enables SystemLink to use a common identity for users across multiple applications. This also means SystemLink leverages corporate single sign-on (SSO) and all its security benefits, such as streamlined login and limiting user credential proliferation. You can use OpenID Connect alongside or as a replacement for LDAP, Active Directory, and local Windows accounts for authentication.
4.1 Assumptions and Prerequisites
-
A server running SystemLink 2020R4 or greater. Refer to Installing and Configuring SystemLink Server and Clients for the basics of setting up a SystemLink server
-
An active Advanced Server license for the SystemLink server. If the license is inactive or expires, users will be able to log in with OpenID Connect, but they will not have any permissions and will see a blank page.
-
A DNS name for the SystemLink server
-
SystemLink login with the Server Administrator role
-
Administrator desktop access to the SystemLink server
-
An OpenID Connect Provider server such as PingFederate, Azure ADFS, Okta, or another certified provider that has been fully set up and configured for OpenID Connect authentication
4.2 Enabling OpenID Connect in SystemLink
-
Log into the server running SystemLink and go to
C:\Program Files\National Instruments\Shared\Web Server\conf\openidc. -
Add the configuration files to SystemLink to connect to your OpenID Connect provider.
For details, refer to 4.3 OpenID Connect Configuration Files in SystemLink Server.
-
In SystemLink 2021R1 and later, configure the claim to use as the SystemLink username. This step is optional, but should be done before users begin using the server.
For details, refer to 4.6 Configuring the SystemLink Username.
-
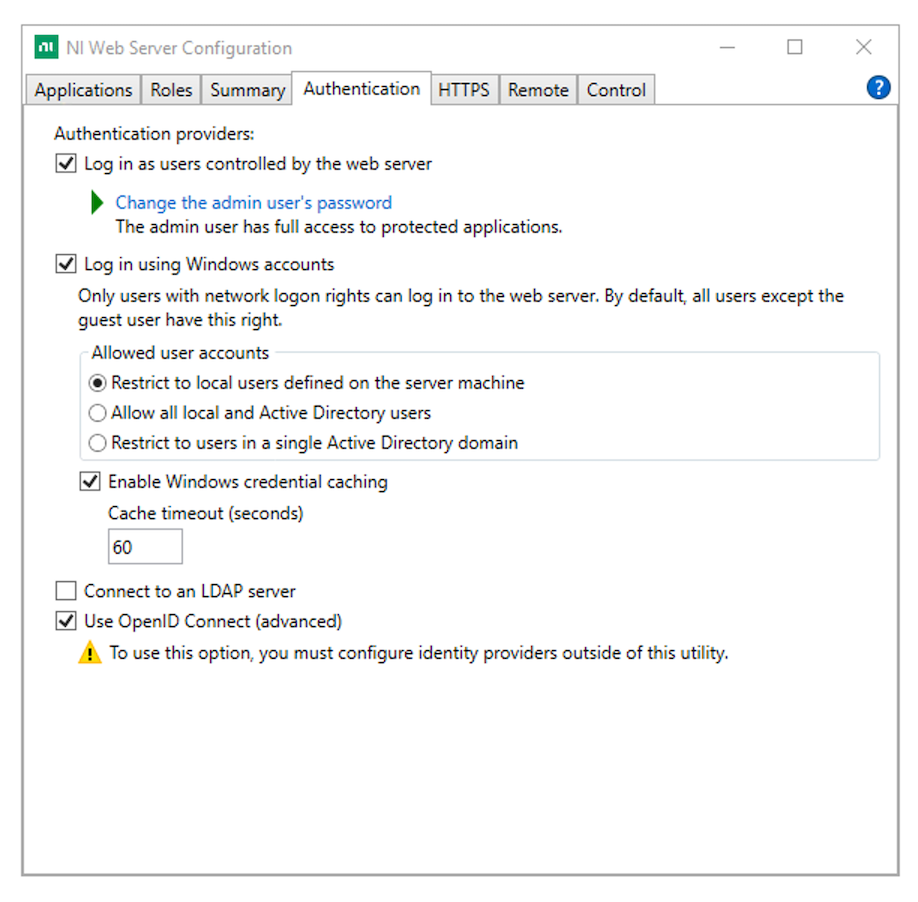
Open NI Web Server Configuration.
-
Go to the Authentication tab and enable Use OpenID Connect (advanced).
-
Click Apply and restart.
-
Log into the SystemLink web application with a user assigned the Server Administrator role.
-
Go to Access Control > Roles and click the gear icon in the top right.
-
Add an OpenID Connect Claim mapping for the Server Administrator role.
For details, refer to 4.5 Mapping OpenID Connect Claims to SystemLink Workspaces and Roles.
-
Log out and log in as an OpenID Connect user with a mapping for the Server Administrator role and confirm they have the correct privileges.
4.3 OpenID Connect Configuration Files in SystemLink Server
There are three files that you must create to connect your SystemLink server to an OpenID Connect provider: [provider-issuer-uri].conf, [provider-issuer-uri].client, and [provider-issuer-uri].provider. The [provider-issuer-uri] portion of each filename must be the URL-encoded fully qualified domain name.
Refer to openid-connect-config for examples of each of these files.
Example
An OpenID Connect provider with the issuer URI example.com:9999/v2 would yield files named example.com%3A9999%2Fv2.conf , example.com%3A9999%2Fv2.client, and example.com%3A9999%2Fv2.provider. You can find the issuer URI by viewing the issuer property at your provider's OpenID Connect configuration endpoint. For example https://example.com:9999/v2/.well-known/openid-configuration.
These files do not exist for new SystemLink installations. Add each file to C:\Program Files\National Instruments\Shared\Web Server\conf\openidc. Restart the NI Web Server to apply changes.
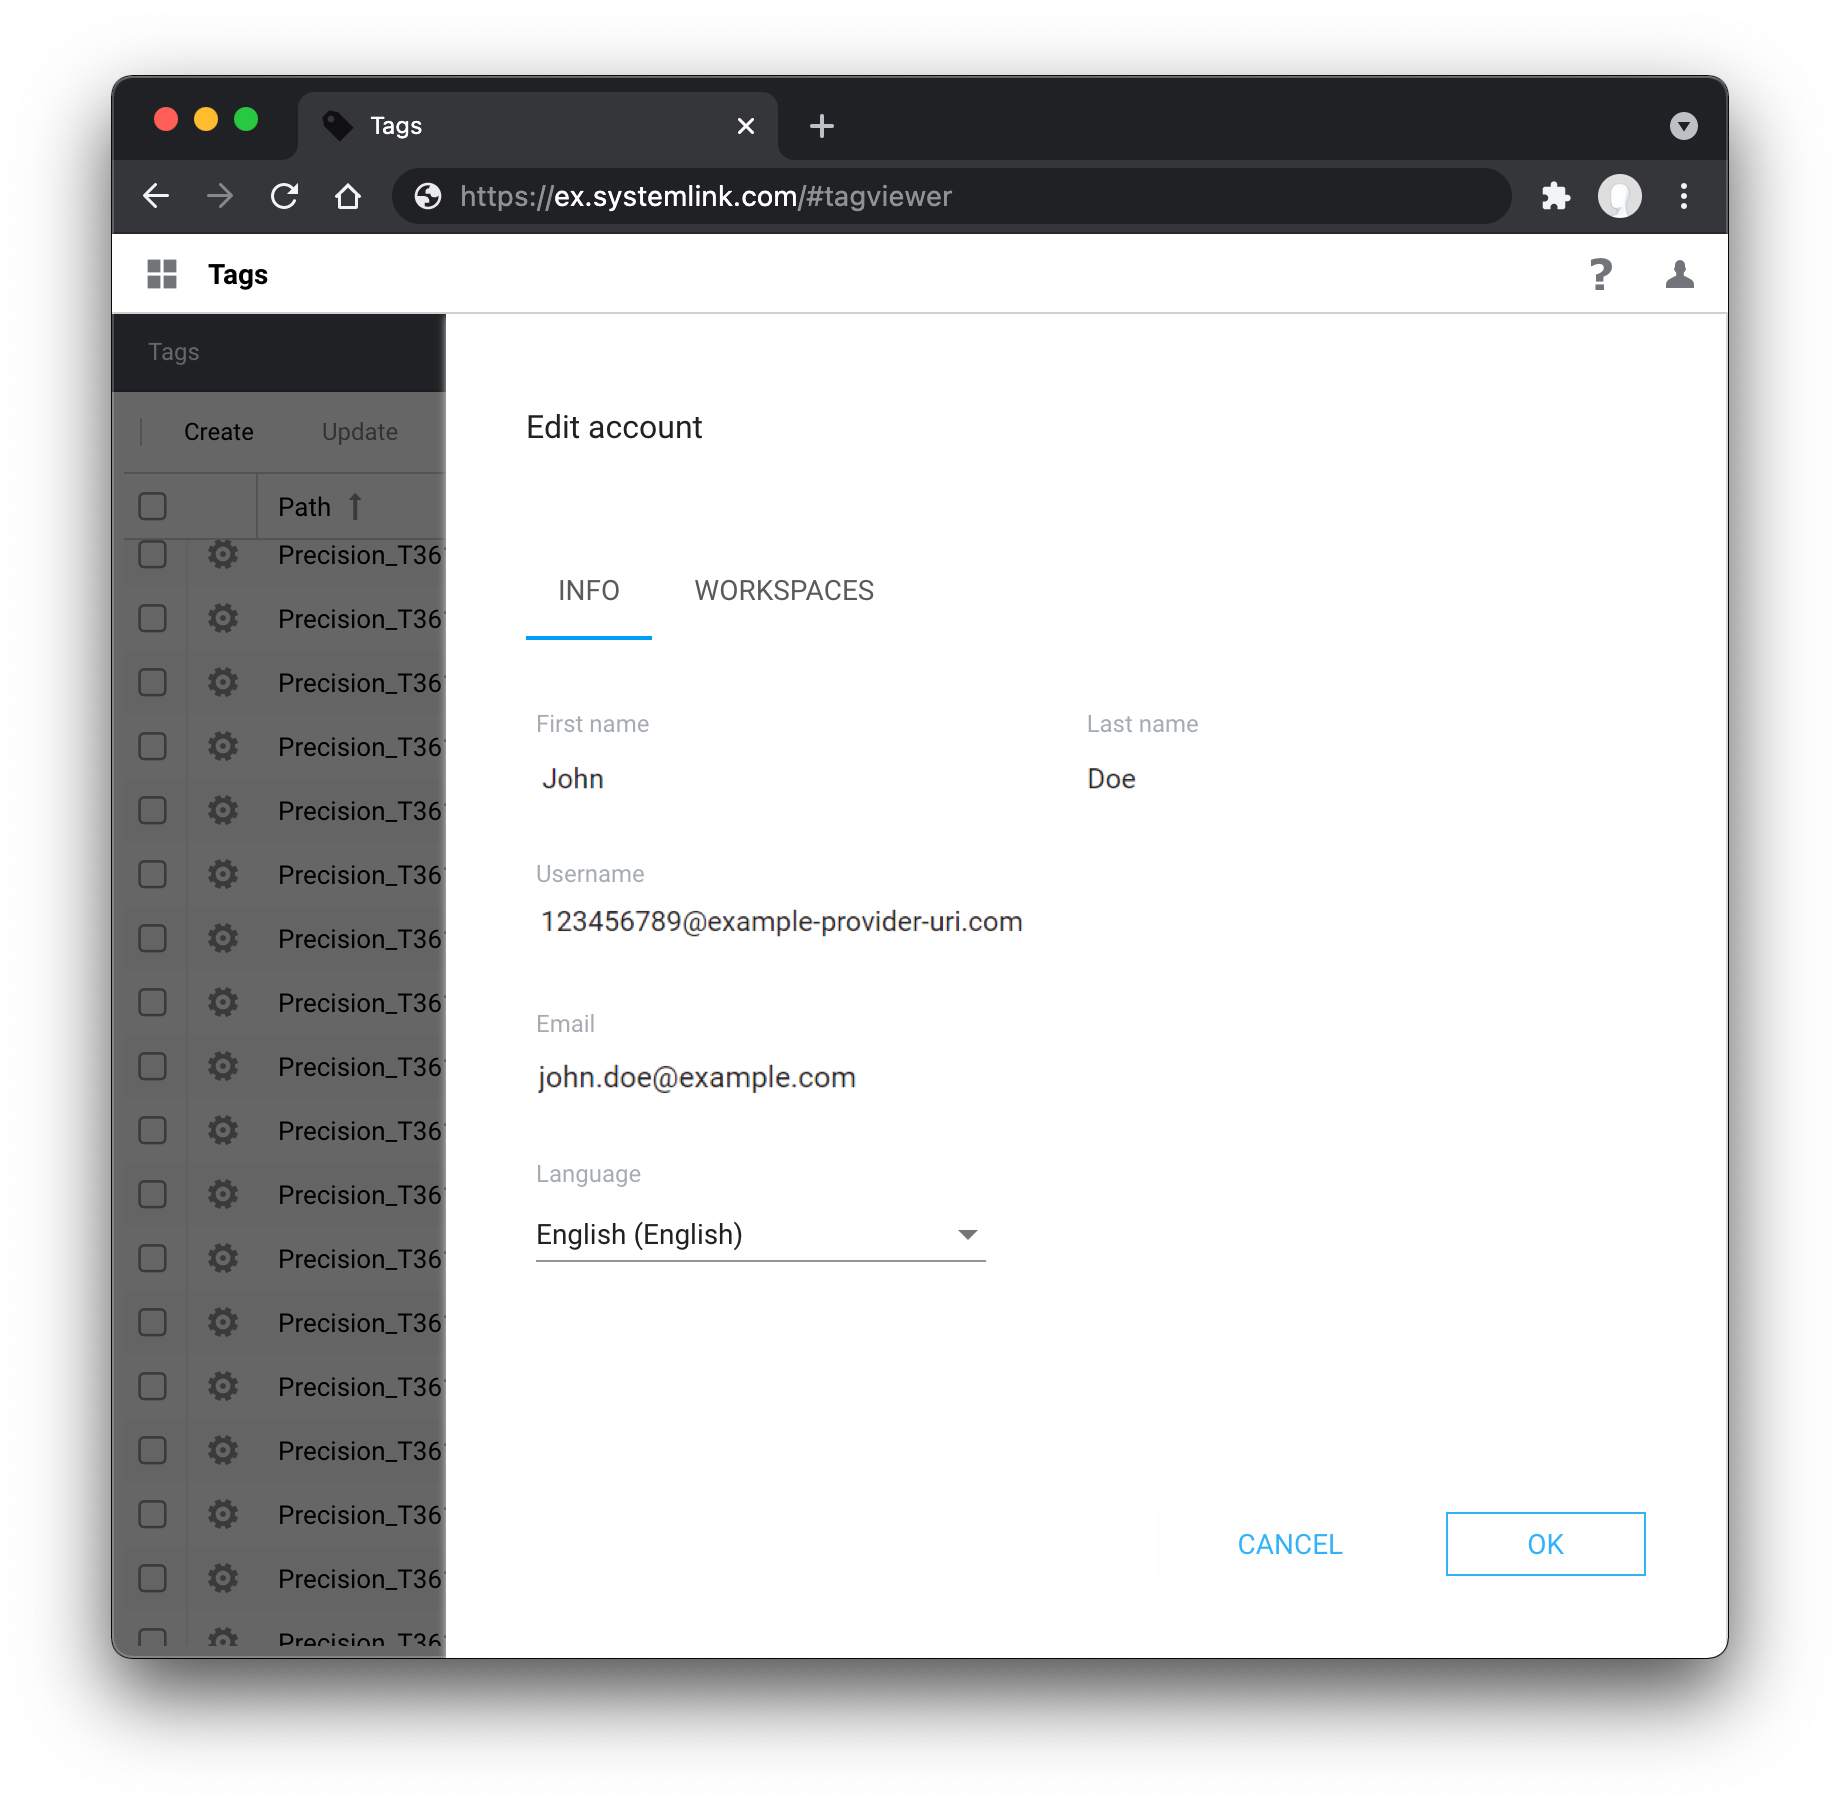
You can configure SystemLink to support multiple OpenID Connect providers simultaneously by creating a [provider-issuer-uri].conf, [provider-issuer-uri.client, and [provider-issuer-uri].provider file for each provider. The user ID in SystemLink must be unique across providers. This ID takes the form [sub_claim]@issuer. You can see the ID SystemLink associates with a user in the user details in SystemLink Access Control.
4.3.1 SystemLink Login Configuration
[provider-issuer-uri].conf describes the scopes SystemLink will request, the text and icon for the provider login button, and private keys for ID token key management encryption.
{
  "scope": "openid email profile",
  "ni-attributes": {
    "displayName": "Log in with PingFederate",
    "iconUri": "/login/assets/pf.png"
  },
  "keys": [
    {
      "p": "...",
      "kty": "RSA",
      "q": "...",
      "d": "...",
      "e": "AQAB",
      "use": "enc",
      "kid": "2020-11-20",
      "qi": "...",
      "dp": "...",
      "dq": "...",
      "n": "..."
    }
  ]
}
In this example the openid, email, and profile scopes are requested. Additional scopes may be requested. Consult your provider's documentation regarding exposing scopes to clients. The profile and email scopes are required to populate first name, last name, and email fields in the SystemLink user preferences. These are derived from the given_name, family_name, and email claims respectively.
Each scope contains claims you can map to roles within SystemLink workspaces. See 4.5 Mapping OpenID Connect Claims to SystemLink Workspaces and Roles for details.
The ni-attributes section determines the text and (optionally) an icon to be shown in the SystemLink login page. The iconUri is relative to the htdocs directory (C:\Program Files\National Instruments\Shared\Web Server\htdocs). This icon should be 16x16 px.
The keys section contains the private keys as a JWK Set if the provider uses asymmetric encryption for ID token key management. The corresponding public keys must be registered with the provider. The use property must have a value of enc to indicate the key is used for encryption. The kid property of the private key must match the kid property of the corresponding public key on the identity provider.
The keys section can be omitted if the provider uses symmetric encryption or no encryption for ID token key management.
4.3.2 ClientID and Secret
The [provider-issuer-uri].client file is used by the NI Web Server to authenticate with the provider.
{
  "client_id": "slserver",
  "client_secret": "4vFm89u07xaredactedredactedredactede2tjtsEGQhlLreLVjcyLA0"
}
The client_id and client_secret can be obtained from the provider. Depending on the provider the client_id may be user defined.
4.3.2.1 ClientID and Secret Provider Documentation
PingFederate - Configuring an OAuth Client
Using OAuth 2.0 to Access Google APIs
Okta - Find your Application's credentials
ADFS - Build a server side application using OAuth confidential clients with AD FS 2016 or later
4.3.3 OpenID Connect Configuration and Discovery
The [provider-issuer-uri].provider file includes the contents of the provider's OpenID Connect configuration. This file tells SystemLink which endpoints the provider exposes that are used during login.
You may use curl to create this file. Replace [provider-issuer-uri] with the issuer URI of your OpenID Connect Provider.
curl https://[provider-issuer-uri]/.well-known/openid-configuration -o [provider-issuer-uri].provider
4.3.4 Setting Login Redirect URI
The client configuration for your provider requires a redirect URL that is used during the login flow. This must be the fully qualified domain name, the protocol (https:// or http://), and the port (if 80 or 443 are not used) of the SystemLink server. If the SystemLink server's DNS changes, update this setting with your provider.
Note
NI recommends the DNS name in the redirect URI match the the preferred hostname set in NI Web Server Configuration on the SystemLink server.
4.3.4.1 The SystemLink login redirect URL
Use the following URL to configure the login redirect url for your provider:
[protocol]://[systemlink-dns]/login/openidc-redirect
4.3.4.2 The SystemLink front channel logout URL
This configuration is optional for OpenID Connect providers who support front channel logout.
Use the following URL to configure the front channel logout URL your provider:
[protocol]://[systemlink-dns]/login/openidc-redirect?logout=get
4.3.4.3 Provider Client Configuration Documentation
PingFederate - Configure an OAuth client
Google - Using OAuth 2.0 for Web Server Applications
Okta - Understand the callback route
4.3.5 Proxy Configuration
If a proxy is required for the SystemLink server to connect to the OIDC provider, do the following.
- Create a new file named
60_openidc_proxy.confin theC:\Program Files\National Instruments\Shared\Web Server\conf\conf.dfolder. - Add the following text to the file, replacing
<host>and<port>with the address of the proxy.
<IfDefine AUTH_OIDC_ENABLED>
    OIDCOutgoingProxy <host>:<port>
</IfDefine>
Restart the NI Web Server to apply this change.
4.4 Supported Signing and Encryption Algorithms
SystemLink supports the following algorithms for ID token signing, ID token key management encryption, and ID token content encryption.
4.4.1 ID Token Signing Algorithm
-
None
-
ECDSA Using P256 Curve and SHA-256
-
ECDSA Using P384 Curve and SHA-384
-
ECDSA Using P521 Curve and SHA-512
-
HMAC using SHA-256
-
HMAC using SHA-384
-
HMAC using SHA-512
-
RSA using SHA-256
-
RSA using SHA-384
-
RSA using SHA-512
-
RSASSA-PSS using SHA-256
-
RSASSA-PSS using SHA-384
-
RSASSA-PSS using SHA-512
4.4.2 ID Token Key Management Encryption Algorithm
Algorithms that do not require a private key:
-
No encryption
-
Direct Encryption with symmetric key
-
AES-128 Key Wrap
-
AES-192 Key Wrap
-
AES-256 Key Wrap
Algorithms that require a private key:
-
RSAES OAEP
-
ECDH-ES
Refer to 4.3.1 SystemLink Login Configuration for information on configuring the private key.
4.4.3 ID Token Content Encryption Algorithm
-
Composite AES-CBC-128 HMAC-SHA-256
-
Composite AES-CBC-192 HMAC-SHA-384
-
Composite AES-CBC-256 HMAC-SHA-512
4.5 Mapping OpenID Connect Claims to SystemLink Workspaces and Roles
Map OpenID Connect claims to roles and workspaces so users can access systems and data managed by SystemLink. This process is the same as the mapping workflow for LDAP and Active Directory attributes. Refer to Assigning Users to Roles in a Workspace in the SystemLink manual. You can also use claims to create a mapping for the Server Administrator role.
4.5.1 Viewing Claims Returned by a Provider
The OpenID Connect provider determines which scopes and claims clients can access. To see available claims, use the userinfo_endpoint hosted by the provider. Use https://[provider-issuer-uri]/.well-known/openid-configuration to determine the URL of the userinfo_endpoint. You will need to obtain a valid bearer token to authenticate and access this endpoint.
Example curl request to return user info. The bearer token has been truncated for readability.
curl -s https://slsso-runtime.com/idp/userinfo.openid -H 'Authorization: Bearer eyJhbGciOiJSUzI1NiI...zJVy2oLnrBmXTmpDRm499U4~'|python -m json.tool
You can also view claims returned by a particular user by modifying the httpd configuration on your SystemLink server.
- Go to
C:\Program Files\National Instruments\Shared\Web Server\conf\defines.d\and open50_mod_auth_openidc-defines.confin a text editor. - Change the configuration
UnDefine AUTH_OIDC_ENABLE_CLAIM_INFOtoDefine AUTH_OIDC_ENABLE_CLAIM_INFO. - Restart NI Web Server.
- Go to
[protocol]://[systemlink-dns]/login/openidc-redirect?info=htmlor[protocol]://[systemlink-dns]/login/openidc-redirect?info=jsonto view user claims.
An example 50_mod_auth_openidc-defines.conf modified to expose user claims. You must be logged via OpenID Connect to receive data from this endpoint.
#
# Defined OpenID-Connect configuration for the Windows Apache installation.
#

# The name of the JSON map containing metadata about each identity provider.
Define AUTH_OIDC_ATTRIBUTES_KEY ni-attributes

# CA bundle to use when making requests to an identity provider.
Define AUTH_OIDC_BUNDLE ../nicurl/ca-bundle.crt

# Path to OIDC provider configuration.
Define AUTH_OIDC_PROVIDER_DIR ${HTCONF_PATH}/openidc

# The location to redirect when performing an OpenID-Connect login.
Define AUTH_OIDC_REDIRECT_URI /login/openidc-redirect

#
# User-editable variables.
#

# Whether OIDC is enabled.
Define AUTH_OIDC_ENABLED

# When enabled, /login/openidc-redirect?info=json and
# /login/openidc-redirect?info=html will return the claims for the currently
# logged in user.
Define AUTH_OIDC_ENABLE_CLAIM_INFO
If the provider is https with a certificate signed by a CA not included in the NI-CURL CA bundle (C:\Program Files\National Instruments\Shared\nicurl\ca-bundle.crt), then the AUTH_OIDC_BUNDLE define in 50_mod_auth_openidc-defines.conf must to be updated to point to a CA bundle containing the provider's CA. The path can be absolute, or relative to C:\Program Files\National Instruments\Shared\Web Server.
4.5.2 Mapping Claims to SystemLink Roles
Claims are returned as a JSON object.
Example response from userinfo_endpoint. Use any of these claims to a map a user to a role in a workspace.
{
    "email": "jane.doe@ni.com",
    "family_name": "Doe",
    "given_name": "Jane",
    "name": "Jane Doe",
    "ni_employee": "2670",
    "sub": "jdoe"
}
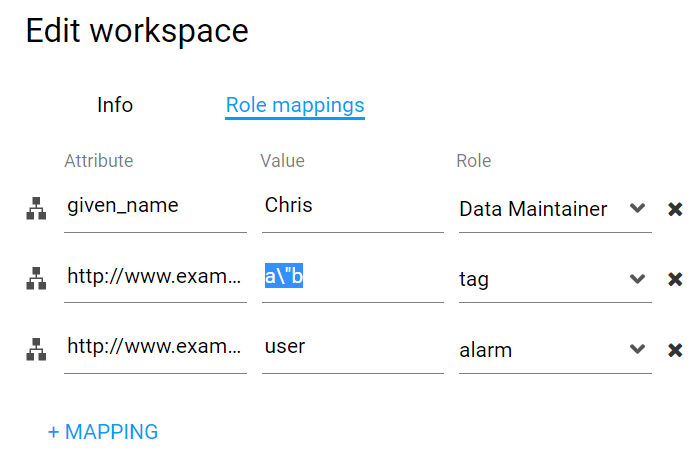
Within the Access Control application the claim and its returned value can be mapped to a role within a workspace.

If the claim value is a scalar, then it must exactly match the value specified in the role mapping. If the claim value is an array, then one of the array elements must exactly match the value specified in the role mappings.
If the claim value contains quotes the quotes must be escaped with \.
Example claim containing quotes
{
  "userinfo": {
    "sub": "88442211",
    "country": "US",
    "name": "Bob Smith",
    "http://www.example.come/roles": [
      "user",
      "a\"b"
    ]
  }
}
4.5.3 Refreshing user claims
Claims are fetched at login. Log out and log back in for updated claims to affect role mappings.
4.6 Configuring the SystemLink Username
Note
The username can be configured in SystemLink 2021R1 and later.
SystemLink creates a unique username for each user using OpenID Connect claims. SystemLink uses the
sub and iss claims by default to ensure that the value is unique across all providers. However those claims often contain internal
IDs or URLs from the provider.
You can change the claim that SystemLink uses as the username.
Warn
To avoid creating duplicate users and losing per-user settings, configure the username before users begin using the server.
-
Go to
C:\Program Files\National Instruments\Shared\Web Server\conf\defines.dand open50_mod_auth_openidc-defines.confin a text editor. -
Find the line
UnDefine AUTH_OIDC_USER_CLAIM. -
Replace
UnDefinewithDefine. -
Append the name of the claim that SystemLink should use as the username.
Note
The username must be unique across all enabled providers, including OpenID Connect, LDAP, Windows, and Web Server users.
Refer to 4.5.1 Viewing Claims Returned by a Provider for information on how to see available claims.
-
Restart the NI Web Server to apply changes.
Example
An example 50_mod_auth_openidc-defines.conf modified to use the OpenID Connect email claim as the SystemLink username.
#
# Defined OpenID-Connect configuration for the Windows Apache installation.
#

# The name of the JSON map containing metadata about each identity provider.
Define AUTH_OIDC_ATTRIBUTES_KEY ni-attributes

# CA bundle to use when making requests to an identity provider.
Define AUTH_OIDC_BUNDLE ../nicurl/ca-bundle.crt

# Override the OIDCCacheShmEntrySizeMax to mitigate claim size issues
Define AUTH_OIDC_CACHE_ENTRY_SIZE 66065

# Path to OIDC provider configuration.
Define AUTH_OIDC_PROVIDER_DIR ${HTCONF_PATH}/openidc

# The location to redirect when performing an OpenID-Connect login.
Define AUTH_OIDC_REDIRECT_URI /login/openidc-redirect

#
# User-editable variables.
#

# Whether OIDC is enabled.
Define AUTH_OIDC_ENABLED

# The claim that will be used as the SystemLink user name.
# If not defined, a combination of the sub and iss claims will be used.
Define AUTH_OIDC_USER_CLAIM email

# When enabled, /login/openidc-redirect?info=json and
# /login/openidc-redirect?info=html will return the claims for the currently
# logged in user.
UnDefine AUTH_OIDC_ENABLE_CLAIM_INFO
4.7 Troubleshooting Failed Authentication
The following sources can be used to troubleshoot a failed connection.
OpenID Connect Provider logs: Consult your OpenID Connect Provider's documentation on the location of their application log files.
NI Web Server Logs: These are found at C:\ProgramData\National Instruments\Web Server\logs.
Note
SystemLink uses log rotation. Beginning with SystemLink 2021R1, look for error.current.log to find the latest errors. For versions of SystemLink prior to 2021R1, find the latest errors by locating the numbered error.log file with the most recent modified date.
Returned Claims: See 4.5.1 Viewing Claims Returned by a Provider.
4.7.1 Cache Entry Size
The OpenID Connect module stores information in a shared memory cache. If a cache entry is too large, users will see an "Internal Server Error" when attempting to log in. This typically occurs when you are returning a large number of claims or claims with large values.
Example error logs
When this happens, the NI Web Server error logs will contain entries like the following:
oidc_cache_shm_set: could not store value since value size is too large
oidc_cache_set: could NOT store X bytes in shm cache backend for key Y
To resolve this issue:
-
Open the following file in a text editor run as Administrator:
C:\Program Files\National Instruments\Shared\Web Server\conf\defines.d\50_mod_auth_openidc-defines.conf -
Find the line starting with
Define AUTH_OIDC_CACHE_ENTRY_SIZE. -
Modify the number at the end to a number larger than X, where X is the required size of the cache entry specified in the error log.
-
Restart the NI Web Server from the
Controltab of the NI Web Server Configuration application.
4.7.2 ID Token Management Encryption
The following situations can lead to an error and redirect the user back to the SystemLink login page after authenticating with the OpenID Connect provider:
-
The provider is using an asymmetric ID token management encryption algorithm and private keys are missing or incorrect
-
The provider is using an unsupported ID token management encryption algorithm
Example error logs
The error will be reported in the NI Web Server error logs:
oidc_proto_parse_idtoken: oidc_jwt_parse failed
The log entry will also contain more information about the problem.
To resolve this issue:
-
Confirm that the provider is using supported encryption and signing algorithms. See 4.4 Supported Signing and Encryption Algorithms. Consult your provider's documentation for information on setting the encryption and signing algorithms.
-
If the provider is using asymmetric ID token management encryption, confirm that the private key is configured in
[provider-issuer-uri].confand the corresponding public key is configured in the provider. Refer to 4.3.1 SystemLink Login Configuration for information on configuring the private key. Consult your provider's documentation for information on configuring the ID token management encryption algorithm and public key.